
Photographing Water in Motion
/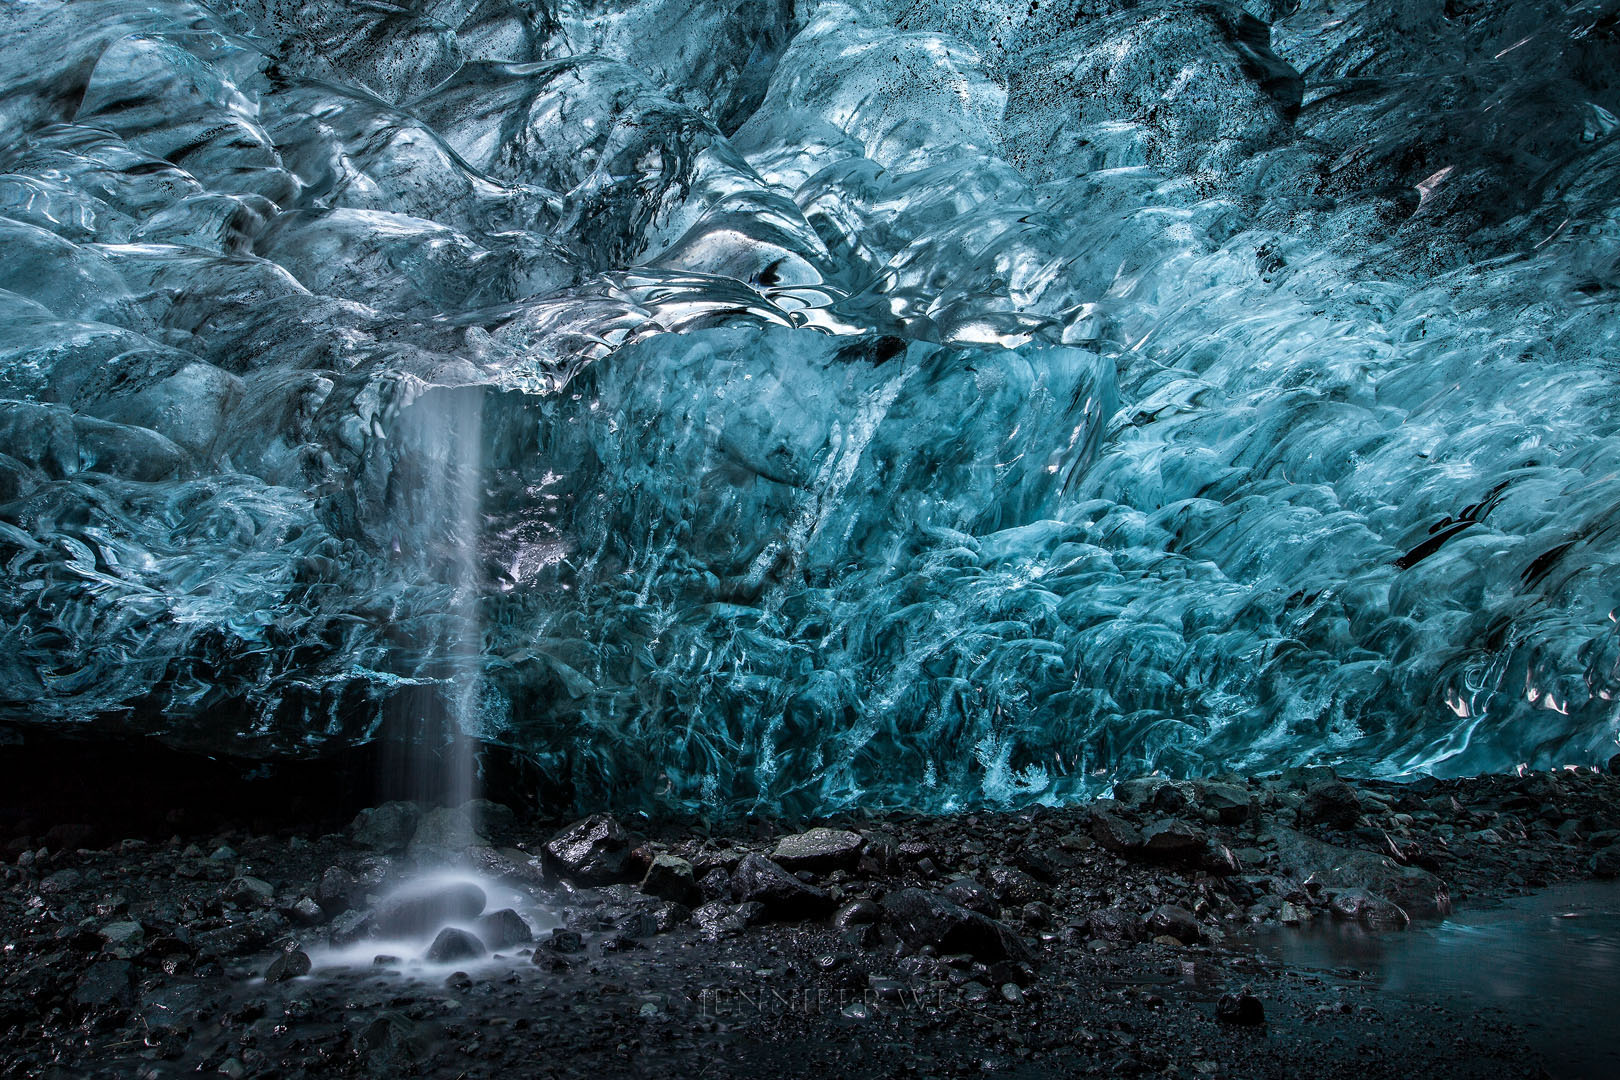
Water and Ice. Photographed in Iceland at f/16, 2.5 Seconds, ISO 100. Polarizer Photographing moving water at varying shutter speeds produces different looks, from a silky effect to frozen detail. When photographing the ocean surf, waterfalls, streams or any moving water, I often bracket the shutter speeds to create a variety of results.
In the vertical waterfall image in Iceland, the water appears smooth and gauzy. The horizontal image of the same waterfall presents more detail, permitting more shape with enough blur to endow the shot with a sense of motion. I like both effects, so I vary the shutter speed to get more or less detail. When bracketing the shutter speeds, review each image on view screen to judge the results. If you see silky water with no detail where it is all white, move to a faster shutter speed. If there is too much detail where the water looks like ice, use a slower shutter to add enough blur for a velvety water effect.
Shutter Speed Choice:
How fast or slow the water is moving is a factor to help decided shutter speed for the amount of blur or detail. A slow versus fast moving stream will have different effects at the same shutter speed. In addition, wider-angle lenses show less apparent motion compared to a telephoto from the same distance.
Several factors to help decide the shutter speed:
- The flow rate of the water – slower shutter for more blur with slow moving streams
- The amount of blur or detail you want – slower shutter for more blur
- Distance to the subject – the water flow appears faster the closer you are
- Focal length of the lens – slower shutter for wide-angle lenses for more blur
Waterfalls all fall at the same rate weather they are a faint stream or large waterfall. They gain momentum with the distance. The air resistance is the only factor that will effect the rate of water falling.
I photographed the waterfall below in Iceland. In the horizontal image, I used a .6 second shutter speed for a satiny effect, while the vertical image has a 1/10 shutter speed to show more detail.
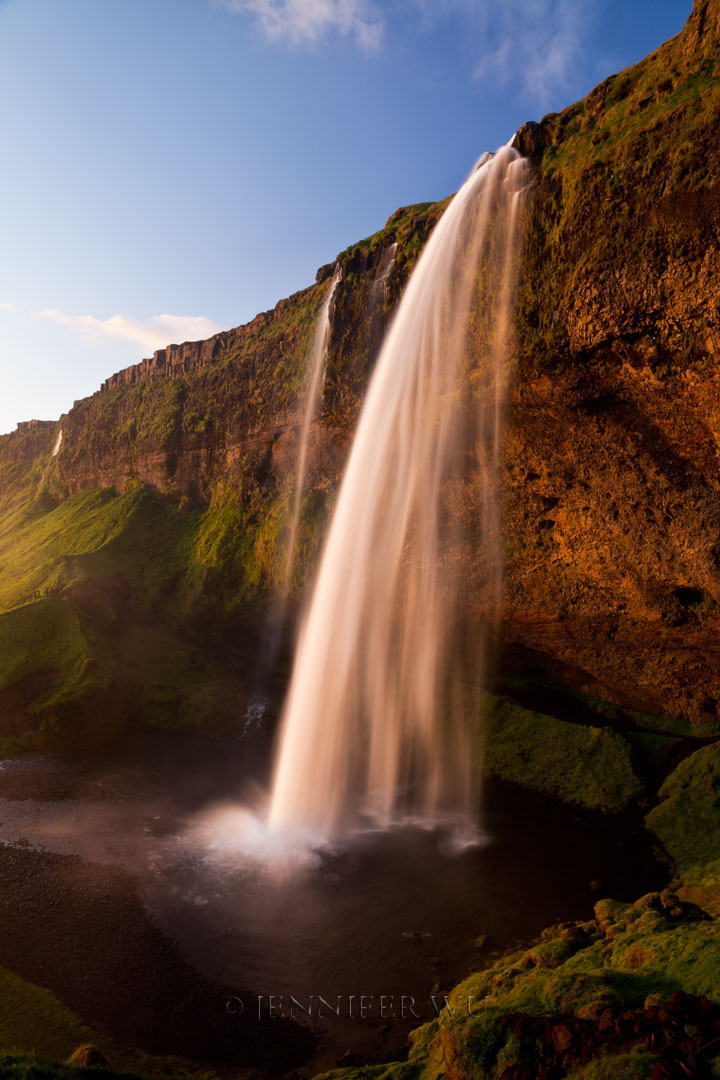
Vertical waterfall above: Canon 5D mark II, 24-70 mm lens at 24 mm, f/16, Shutter speed .6, ISO 100. I used a polarizing filter. Smooth effect.
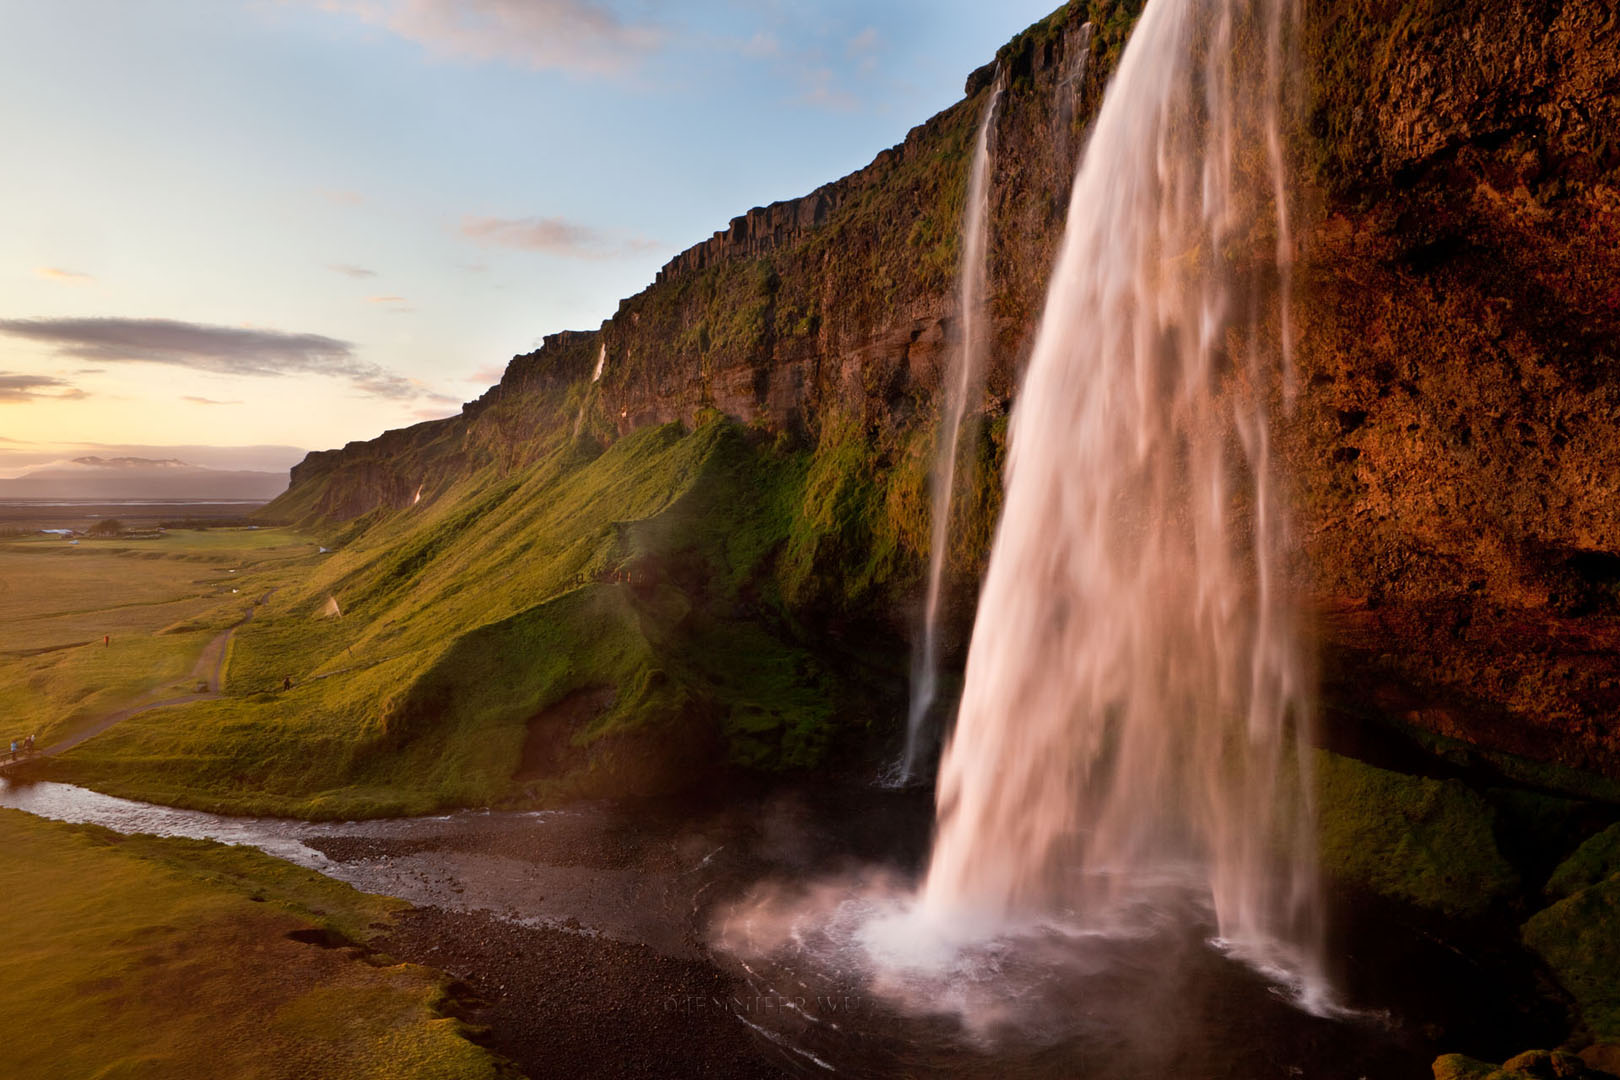
Horizontal waterfall: Canon 5D mark II, 24-70 mm lens at 24 mm, f/16, Shutter speed 1/10, ISO 100. I used a polarizing filter. More detail in the water with a faster shutter speed.
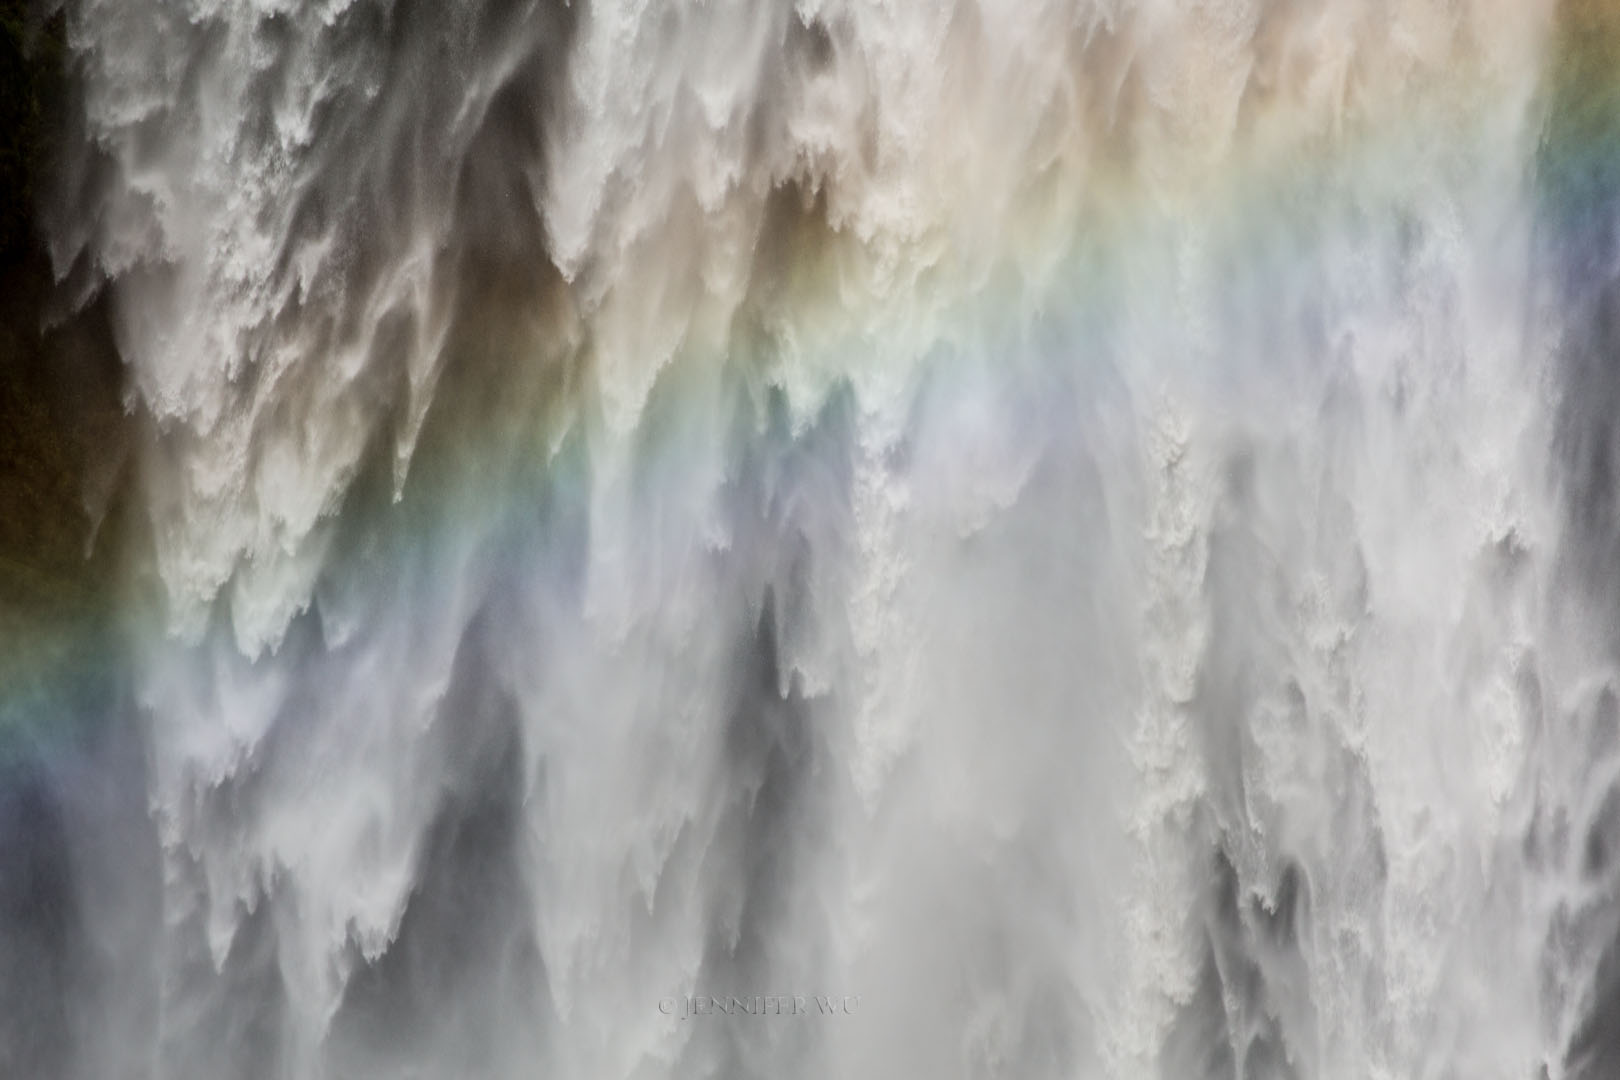
Using 1/125 of a second or faster with a medium telephoto lens helps stop the action on a waterfall and give it some detail. This image was photographed with the 70-300mm lens at 244mm, f/11, 1/250 second, ISO 200. Polarizer used to enhance the rainbow. Be careful as you can make the rainbow disappear when completely polarized.
For grand waterfalls, such as in Yosemite, 1/125 of a second contributes detail in the fast moving waterfalls. By contrast, I prefer 1/15to 1/30 of a second to smooth the slower moving water on the floor of water the valley.
Use a really fast shutter speed to stop the action of moving water. For waves at the ocean, I use around a 1/1000 of a second to get the detail in the splash. Each droplet freezes.
In the next examples, the ocean images have a 10 to 13 second exposure to blur the water, transforming the surf into a fog.

Morro Bay rocks and surf, Canon 5D mark II, 24-70 mm lens at 24 mm, f/16, 10 seconds, ISO 100. I used a 3-stop neutral density filter and a polarizer to smooth out the ocean surf.
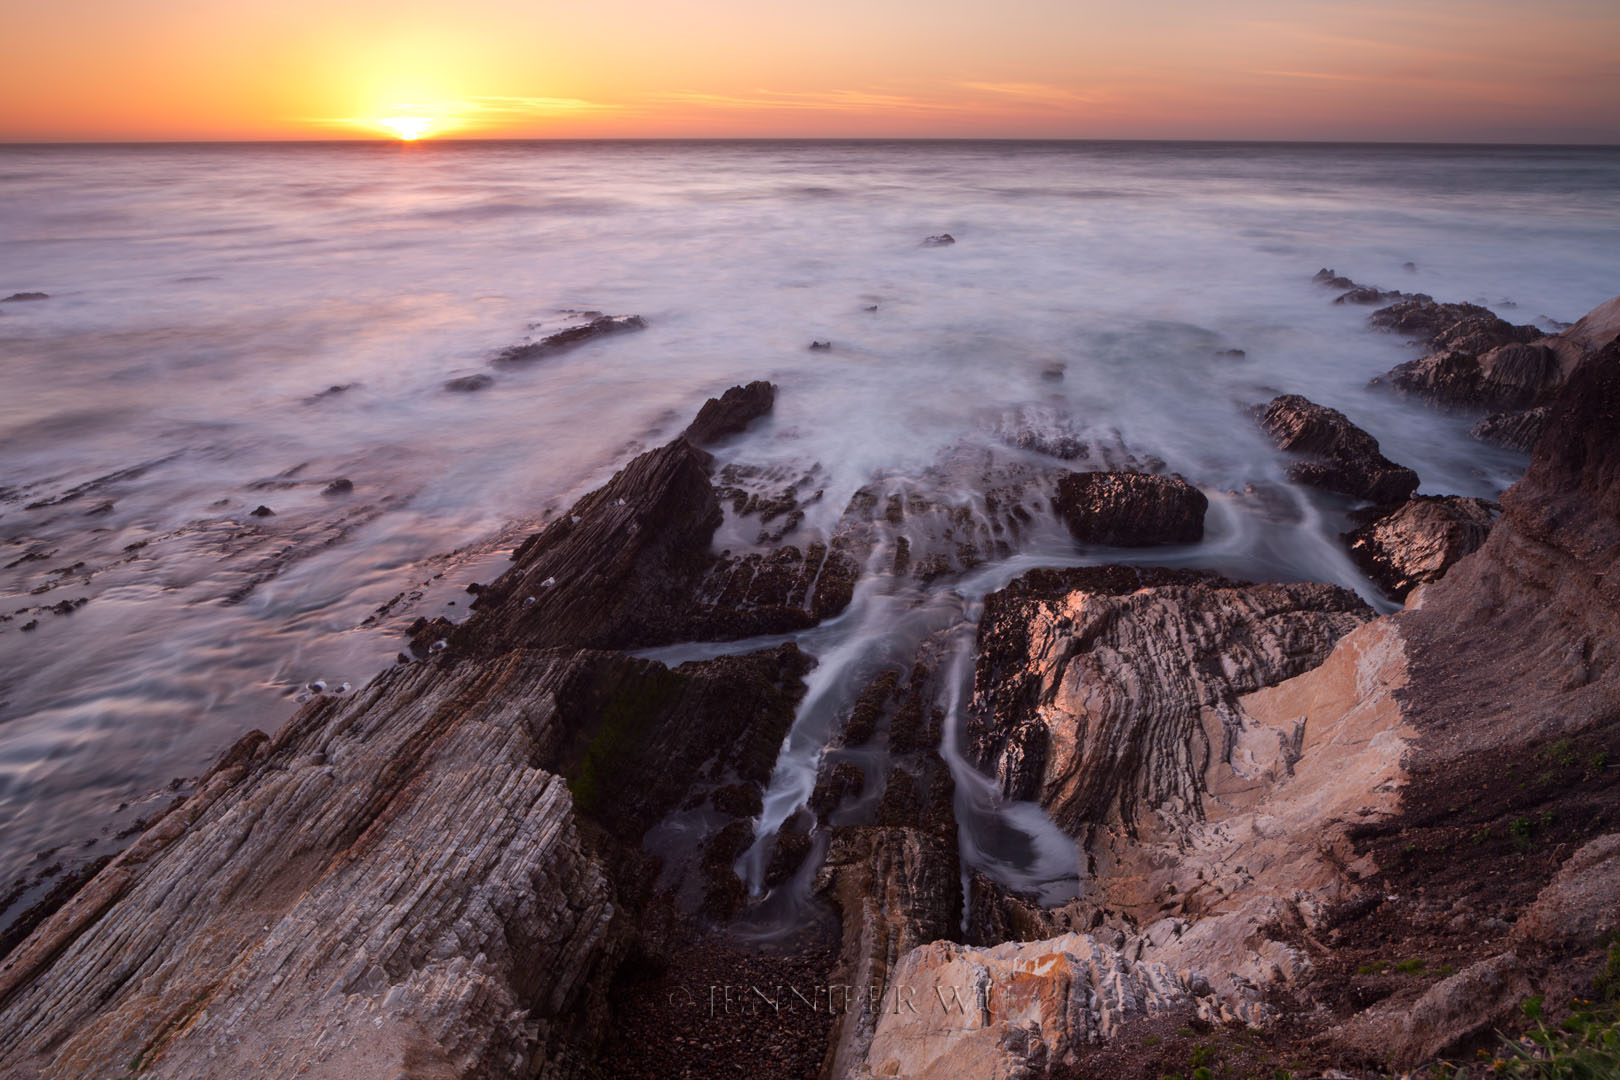
Morro Bay sunset: Canon 5D mark II, F/16, 13 seconds, ISO 100. I used a 5-stop neutral density filter to obtain the softness of the waves.
Tripod: Using a STURDY tripod will be necessary for the slow shutter speeds. They are still a good idea for higher shutter speeds as they aid in fine-tuning the final composition. Keep in mind it is often windy at the base of a waterfall or around the ocean surf. Weigh down the tripod if necessary to avoid vibration or tipping.
Exposure: when taking a photograph, I decide whether the shutter speed or f/stop is the most important and set that first. Normally, I use manual mode and set the shutter speed first, followed by the f/stop. Next, I set ISO, ideally the native ISO for the camera, such as ISO 100 for Canon, or 200 for Nikon. Native resolution produces the least noise. If the shutter speed is too slow, I raise the ISO to the proper exposure. Finally, I add a filter, as discussed below.
Shutter Speed: In order to get slow shutter speeds for the satiny effect, try photographing in low light conditions since full sun may demand too fast a shutter speed for slow motion. For example: photograph at low light near sunrise or sunset on sunny days, with the subject catching the first or last rays of light. Exposure it easier when he water is in the shade; be aware that your color temperature will change, shifting toward blue. Overcast conditions work well most of the time.
Filters: Using a polarizer will reduce your shutter speed time by about two f-stops. Turn the polarizer to see the effect on shiny rock surfaces and note how the reduced glare reveals detail and form. However, be careful when using a polarizer so as not to take out desired colorful reflections. Neutral density filters (not graduated neutral density filters), grey in color, will reduce the light to the sensor, allowing for a slower shutter speed.
Ideas: Water in all its forms is a dynamic subject open to many approaches. I like photographing streams in the shade with green leaves reflected onto streams in the afternoon (Yosemite’s Fern Spring is good for that). Photographing along Yosemite’s Merced River at sunrise provides the opportunity to capture the warm reflections of the mountains in the river. Fall colors, the leaves lit with sun and the water in shade reflect leaves, is a perennial favorite.
Tips for keeping the lens dry:Use a lens hood to keep spray off the lens. Carry a hand towel or pack towel to dry the camera and tripod when you return to the car from the shoot.Use a chamois cloth to wipe the droplets off the lens. Chamois are used to wipe cars dry and it works just as well on the lens. If you are in heavy spray from waterfalls, the ocean or from rain it is helpful to use carry a small sized soft absorbent pack towel to wipe the lens of most of the water then use the chamois as it will get soaked too fast and become useless.
Tips for cleaning sea spray: First, use an air blower (not canned air) to remove any bits of sand or dust that might scratch the lens.
Next, wipe down your camera and lenses with a damp cloth to clean off the salt from the sea spray. Do this as soon as possible.
If you do get sea spray on the front element of the lens, use some lens cleaning fluid on a wipe or tissue and use that to remove it. Use lens cleaning solution and do not use abrasive or solvents. Wipe in a circular motion from the center outward. Do not put fluid directly on the lens. If it is very misty, bring the fluid and wipes with you to the ocean.
Another option is using a UV filter when at the ocean to protect the front element of the lens from the salt in the sea spray and you can clean the filter after the shoot in the same way as mentioned above.
Clean the eye-piece in the same way if it is needed.
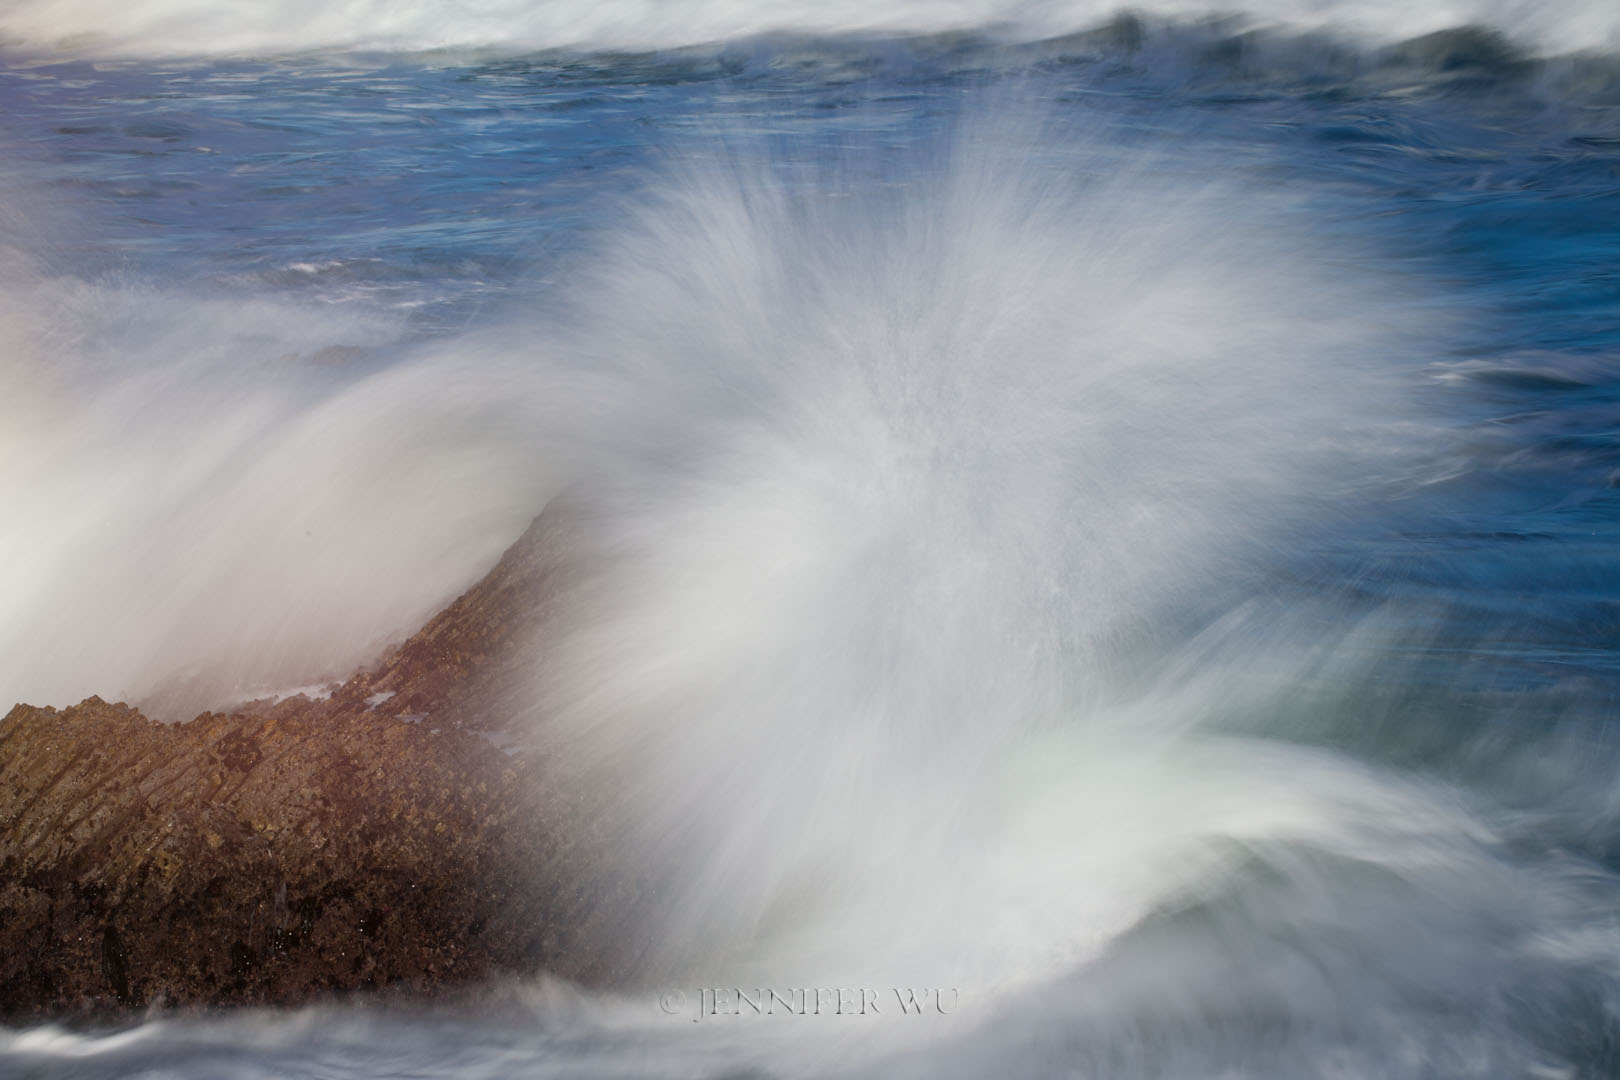
Smooth Wave, Morro Bay, California: Canon 5D mark II, 70-300 mm f/4-5.6 at 135 mm, f/22, 0.4 second, ISO 100.
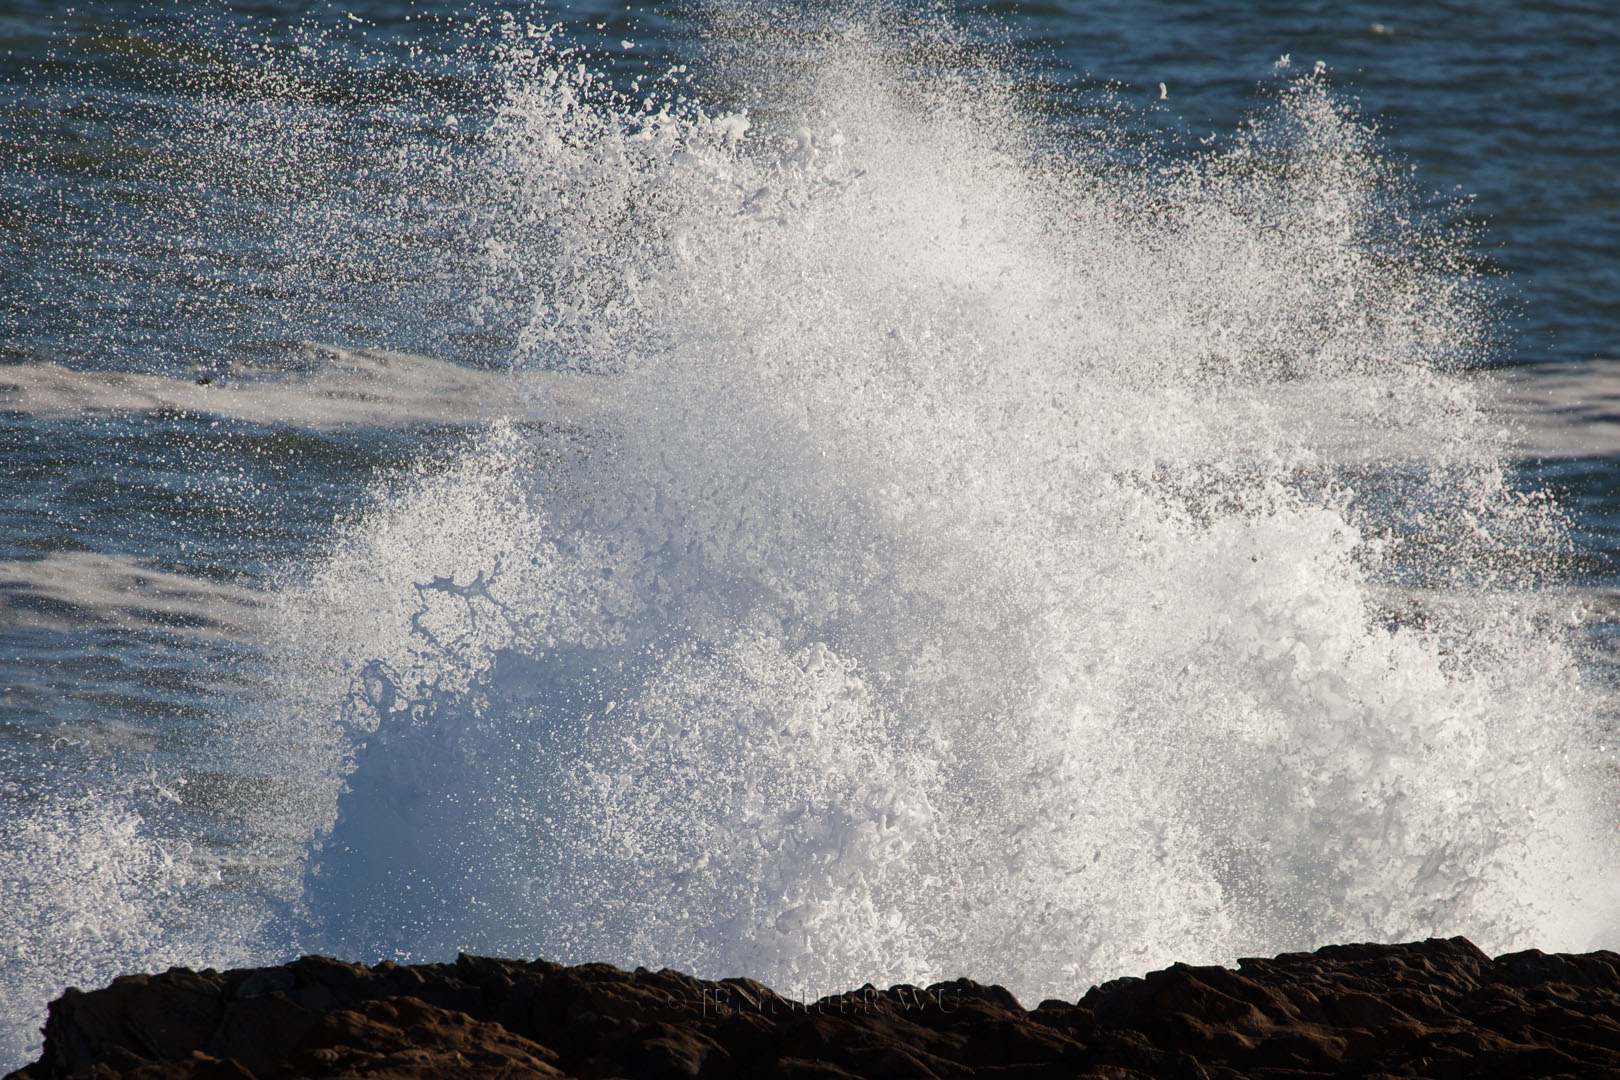
Wave in Action, Morro Bay, California: Canon 5D mark II, 70-300 mm f/4-5.6 at 300 mm, f/5.6, 1/1000th second, ISO 200.
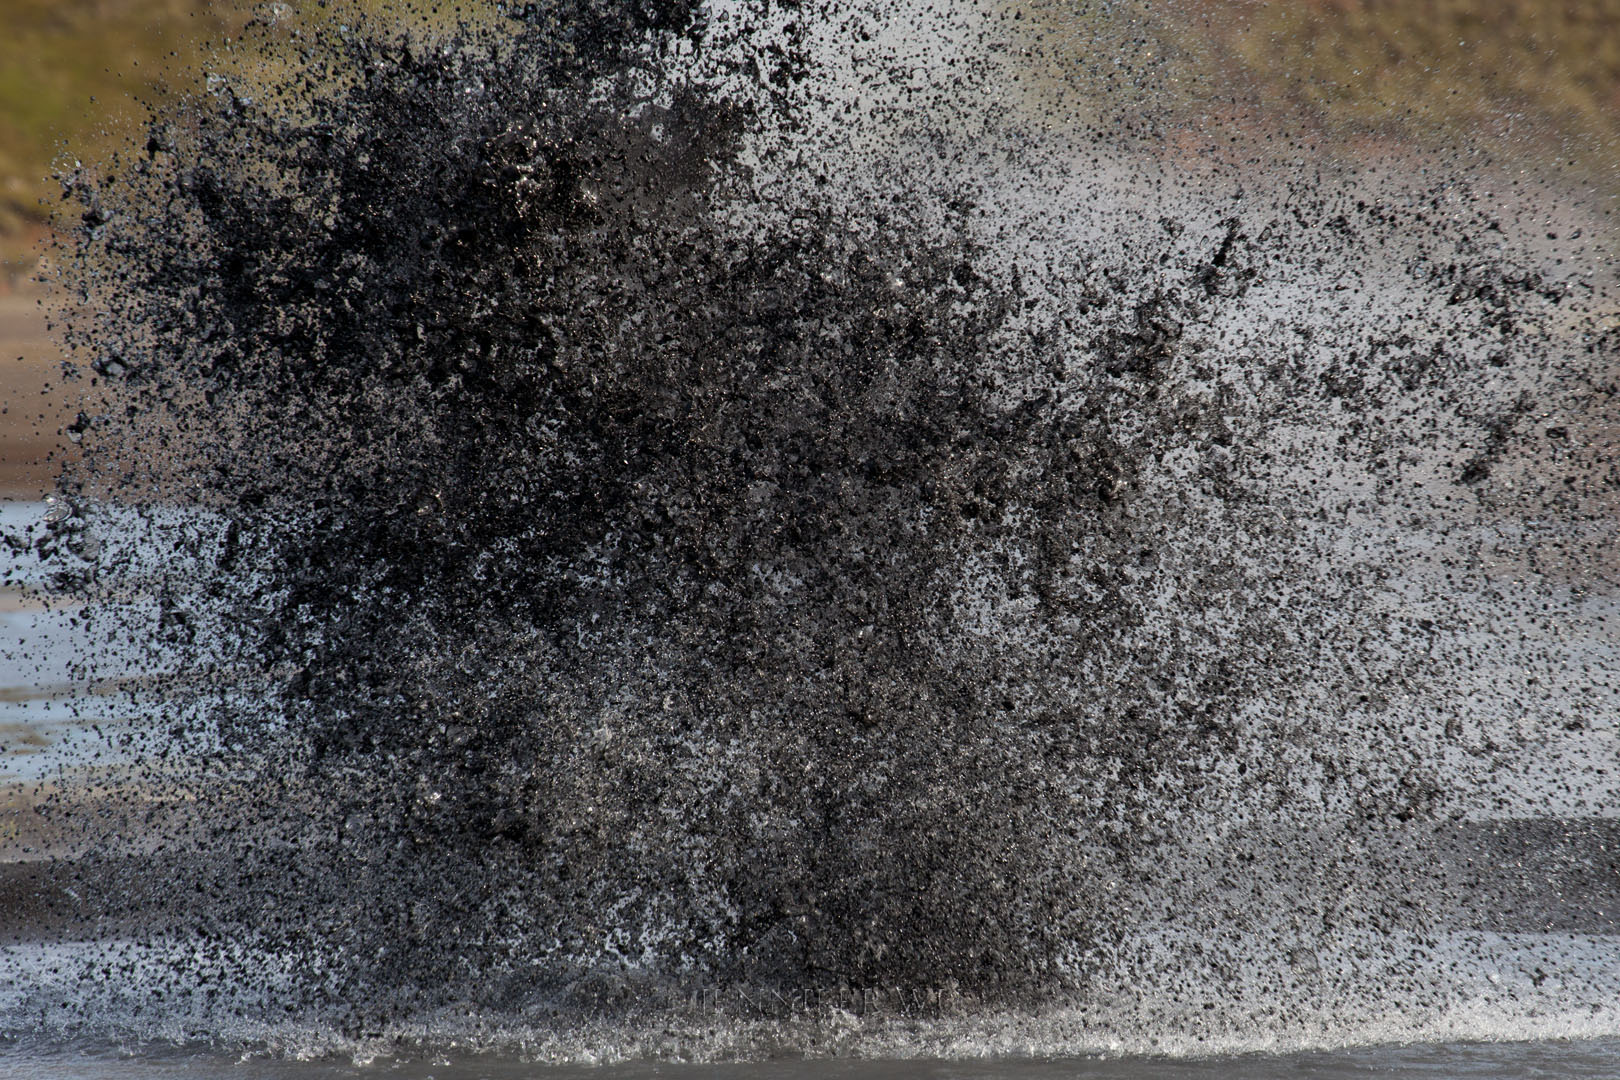
Boiling Mud Pot, Iceland: Canon 5D mark II, 70-300 mm f/4-5.6 at 260 mm, f/9, 1/400 second, ISO 320
Have fun photographing moving water and creating inspiring images!
Cheers, Jennifer